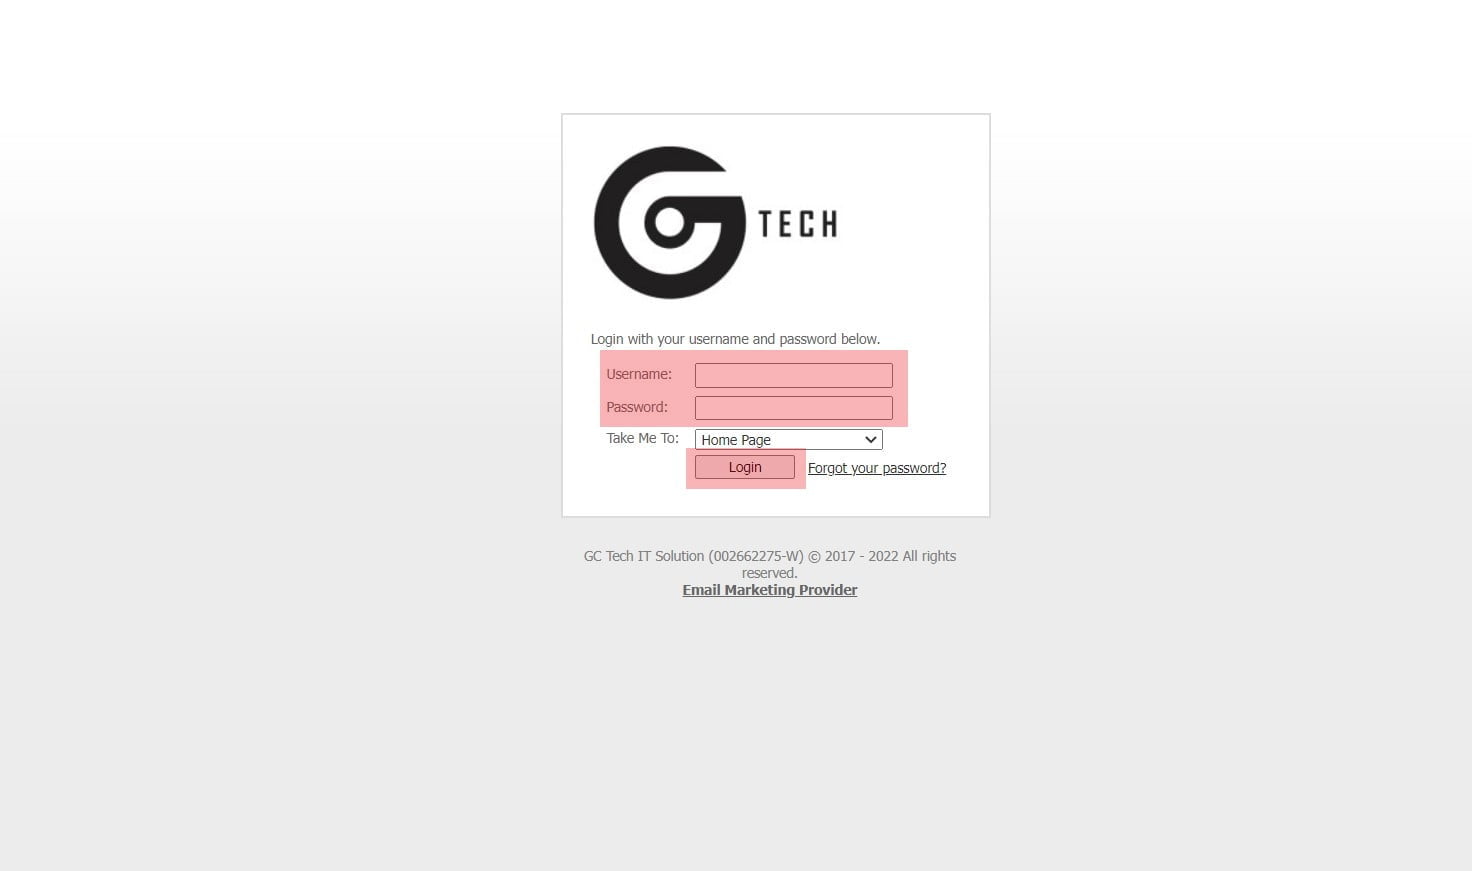
How to send out Email Newsletter
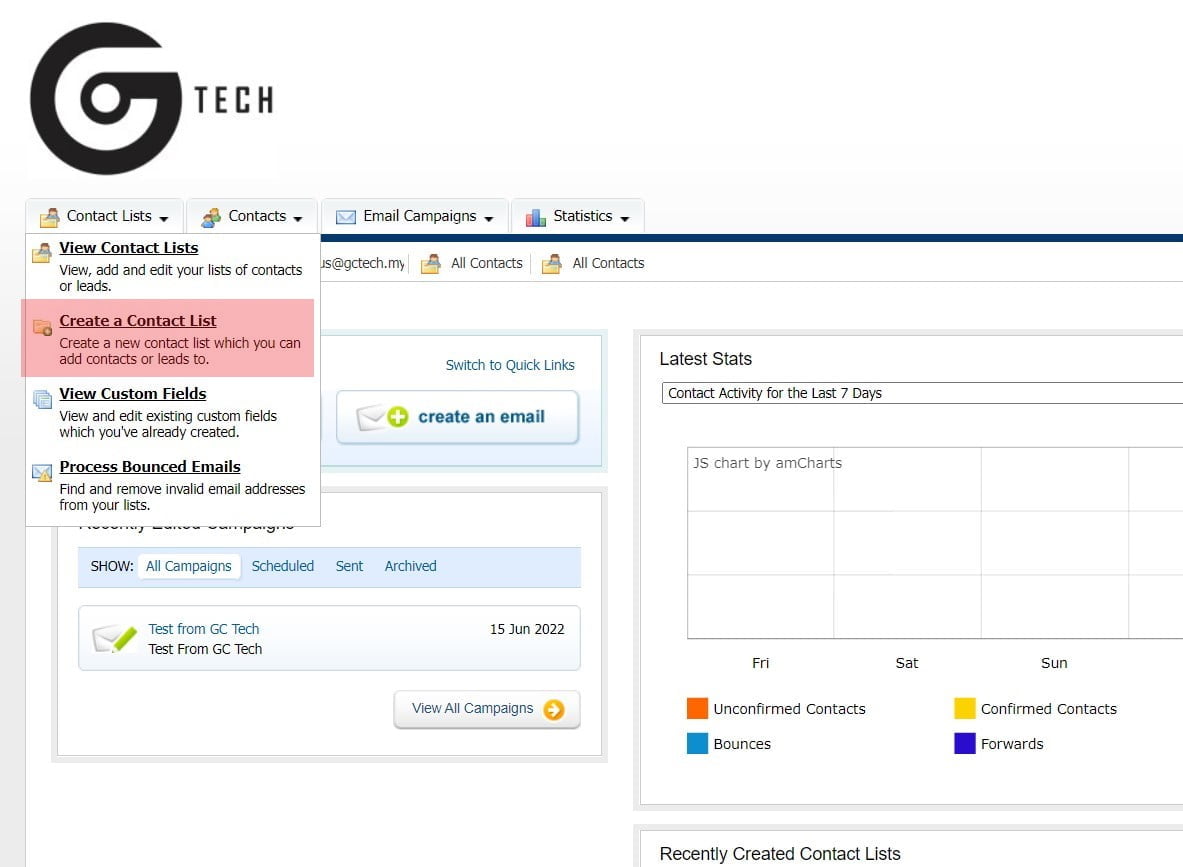
2. Click on Contact Lists and “Create a Contact List”
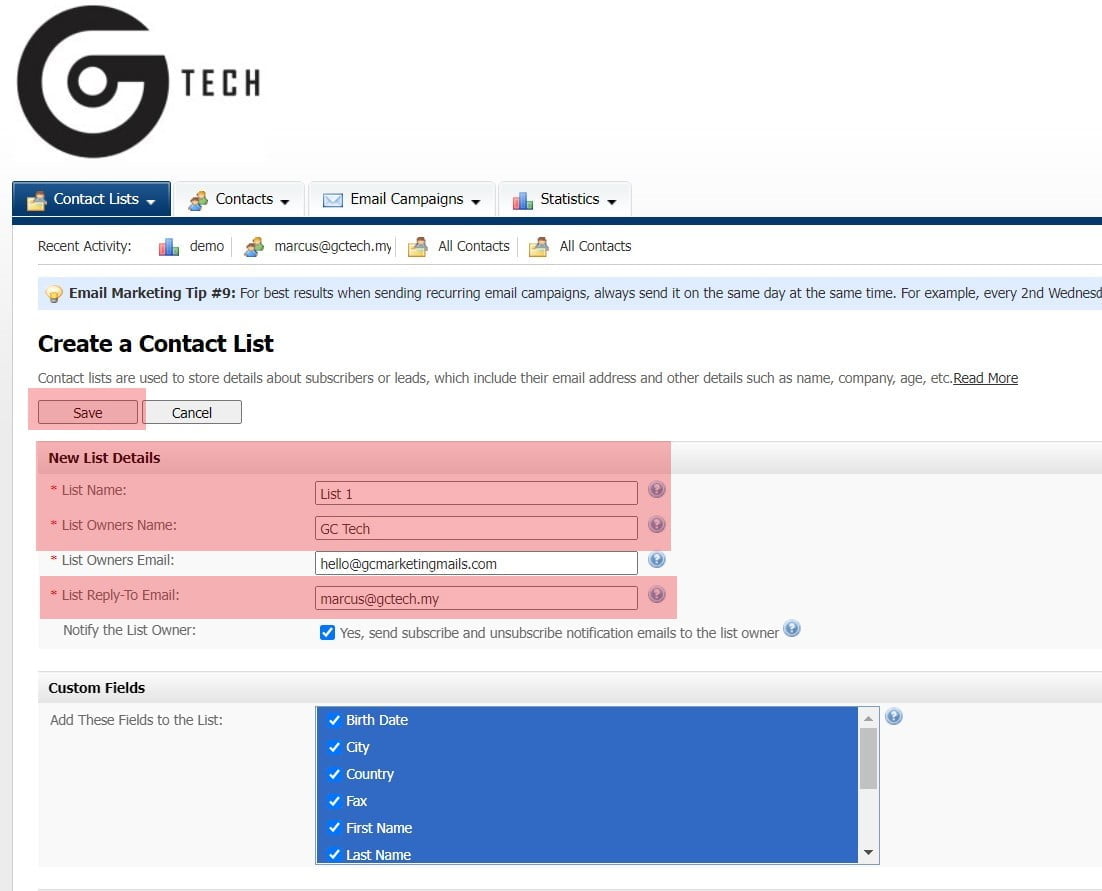
3. Key in List Name, List Owner Name and Change reply to Email.
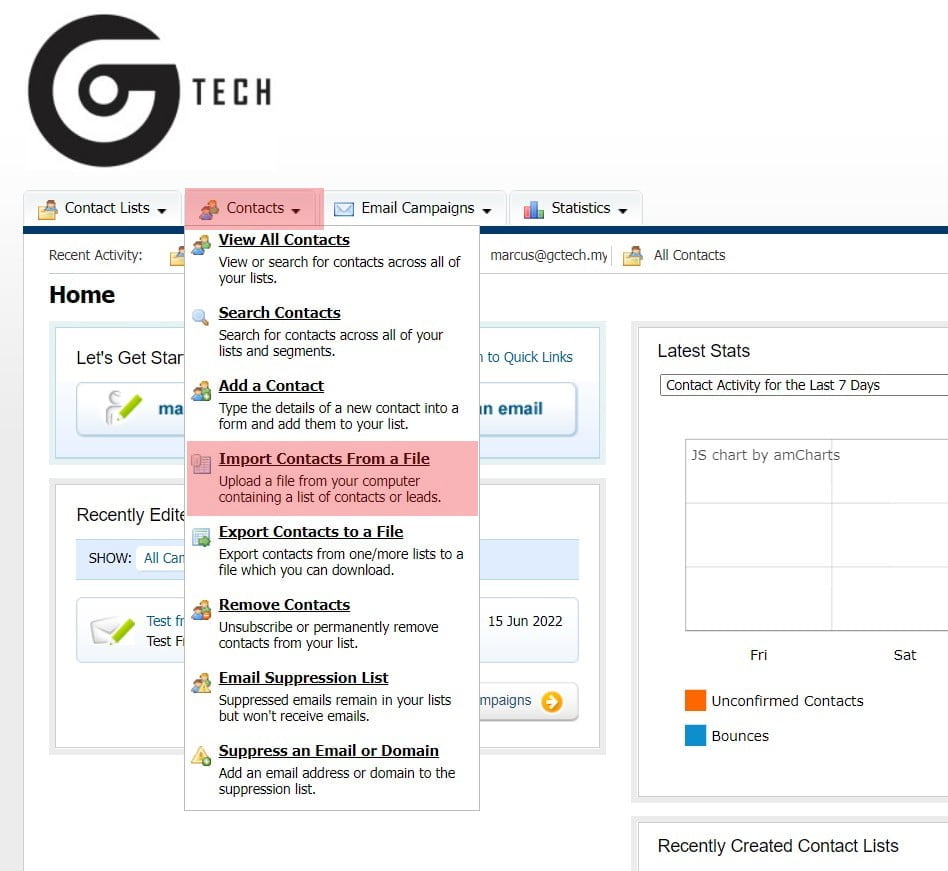
4. Import your Database into Contact List.
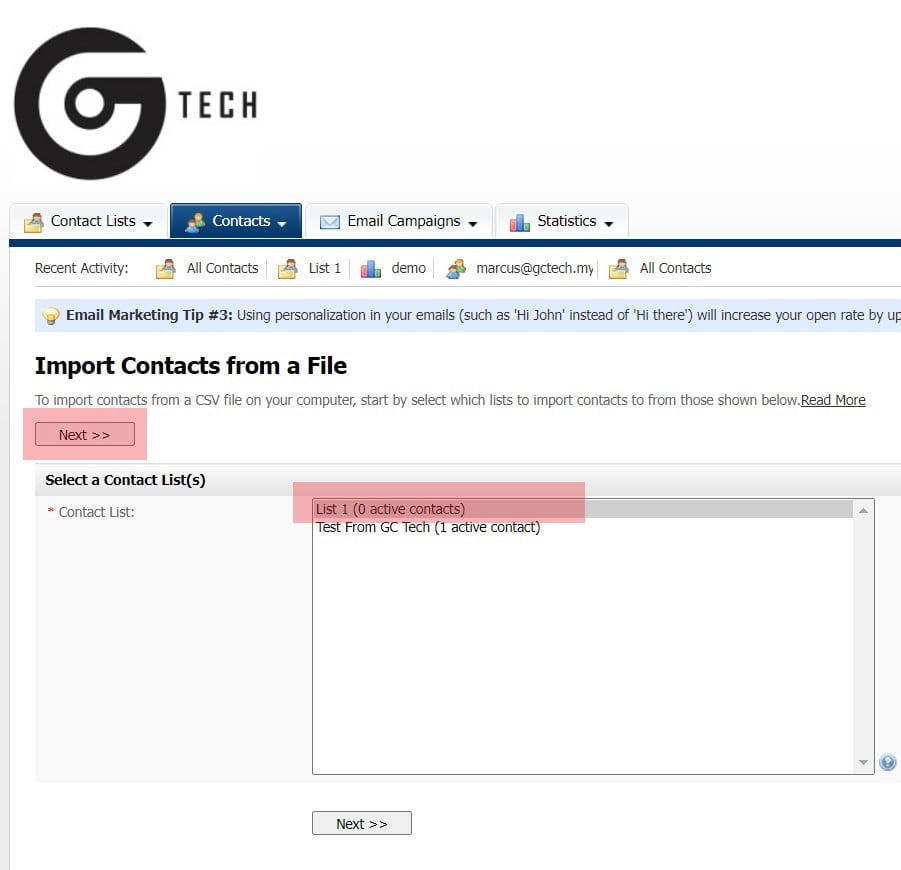
5. Click on the Contact List that you wanted to import your database in.
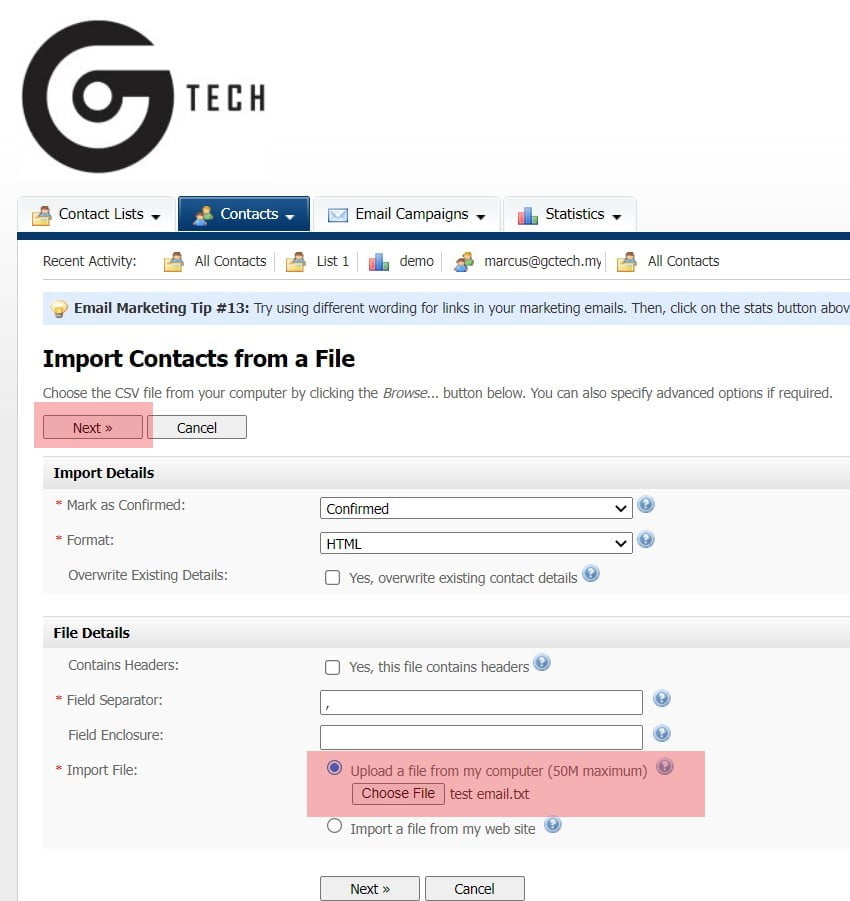
6. I will choose Bulk import email address by using “file”
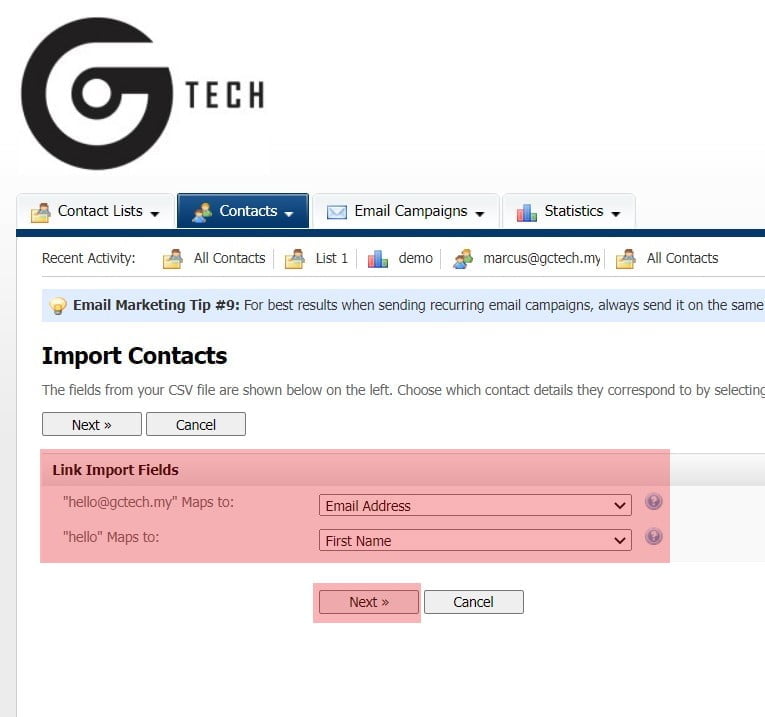
7. Maps the Email to Email, and Name to First Name
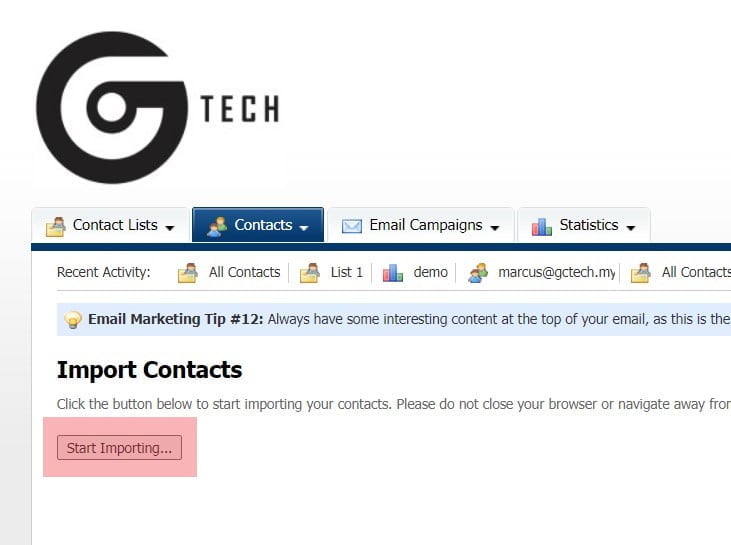
8. Click on Start Import..
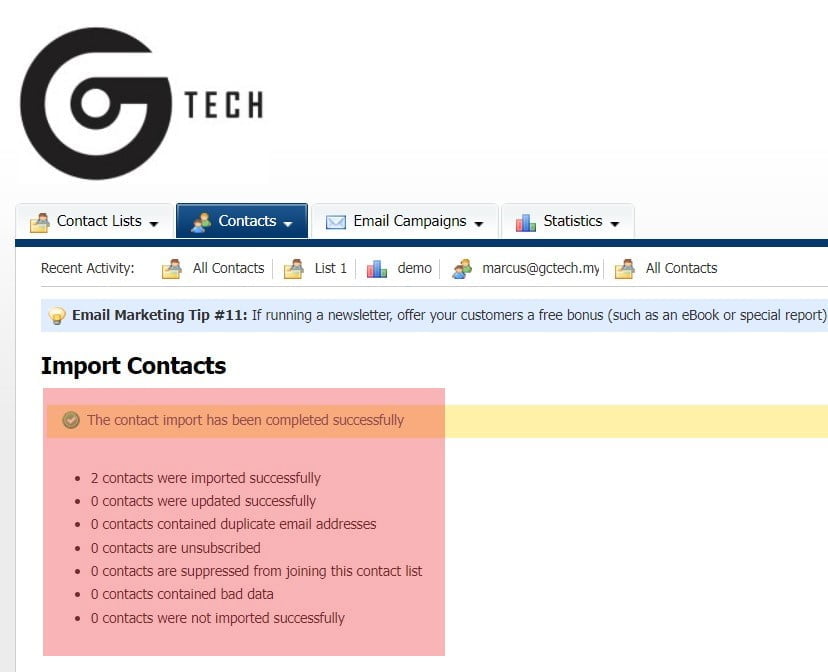
9. Result will show after.

10. Click on Create an Email Campaign to start blasting.
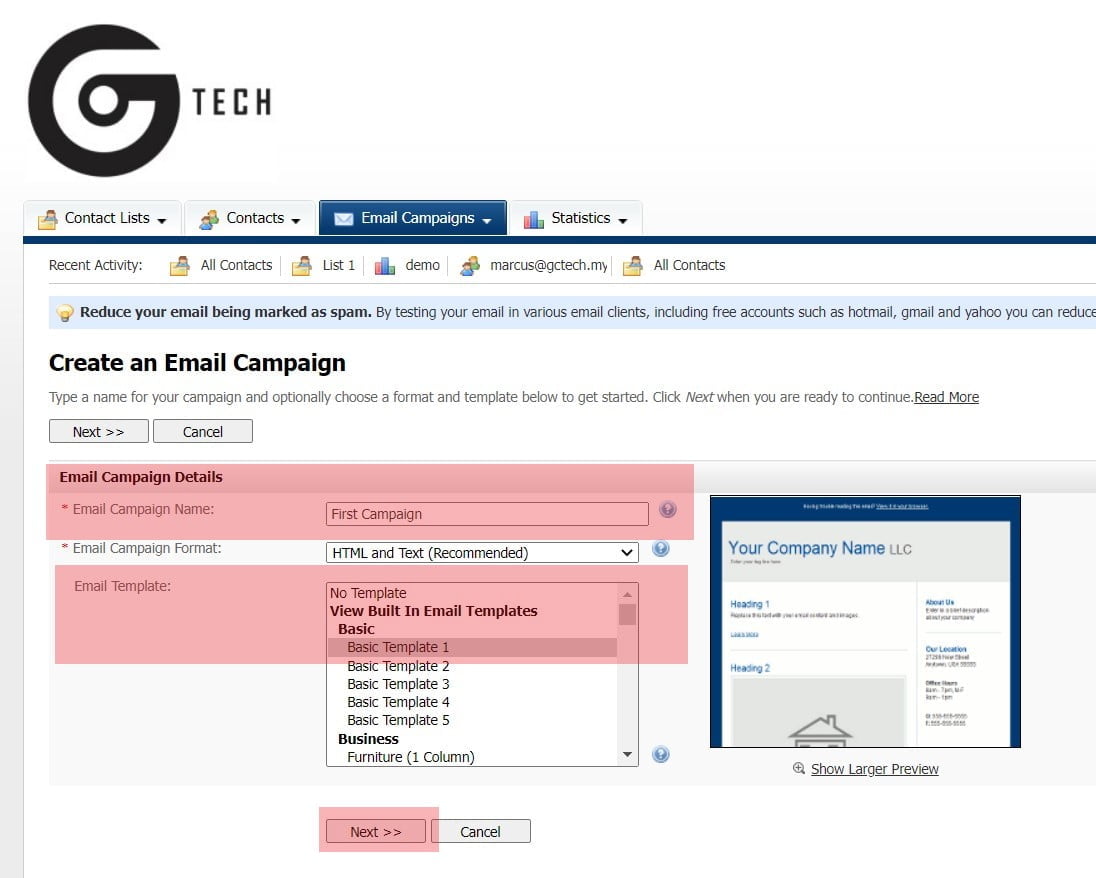
11. Insert Campaign Name for your own reference. For Testing Purpose, I will use the built-in template.
Note : Campaign Name is not Email Subject Title.
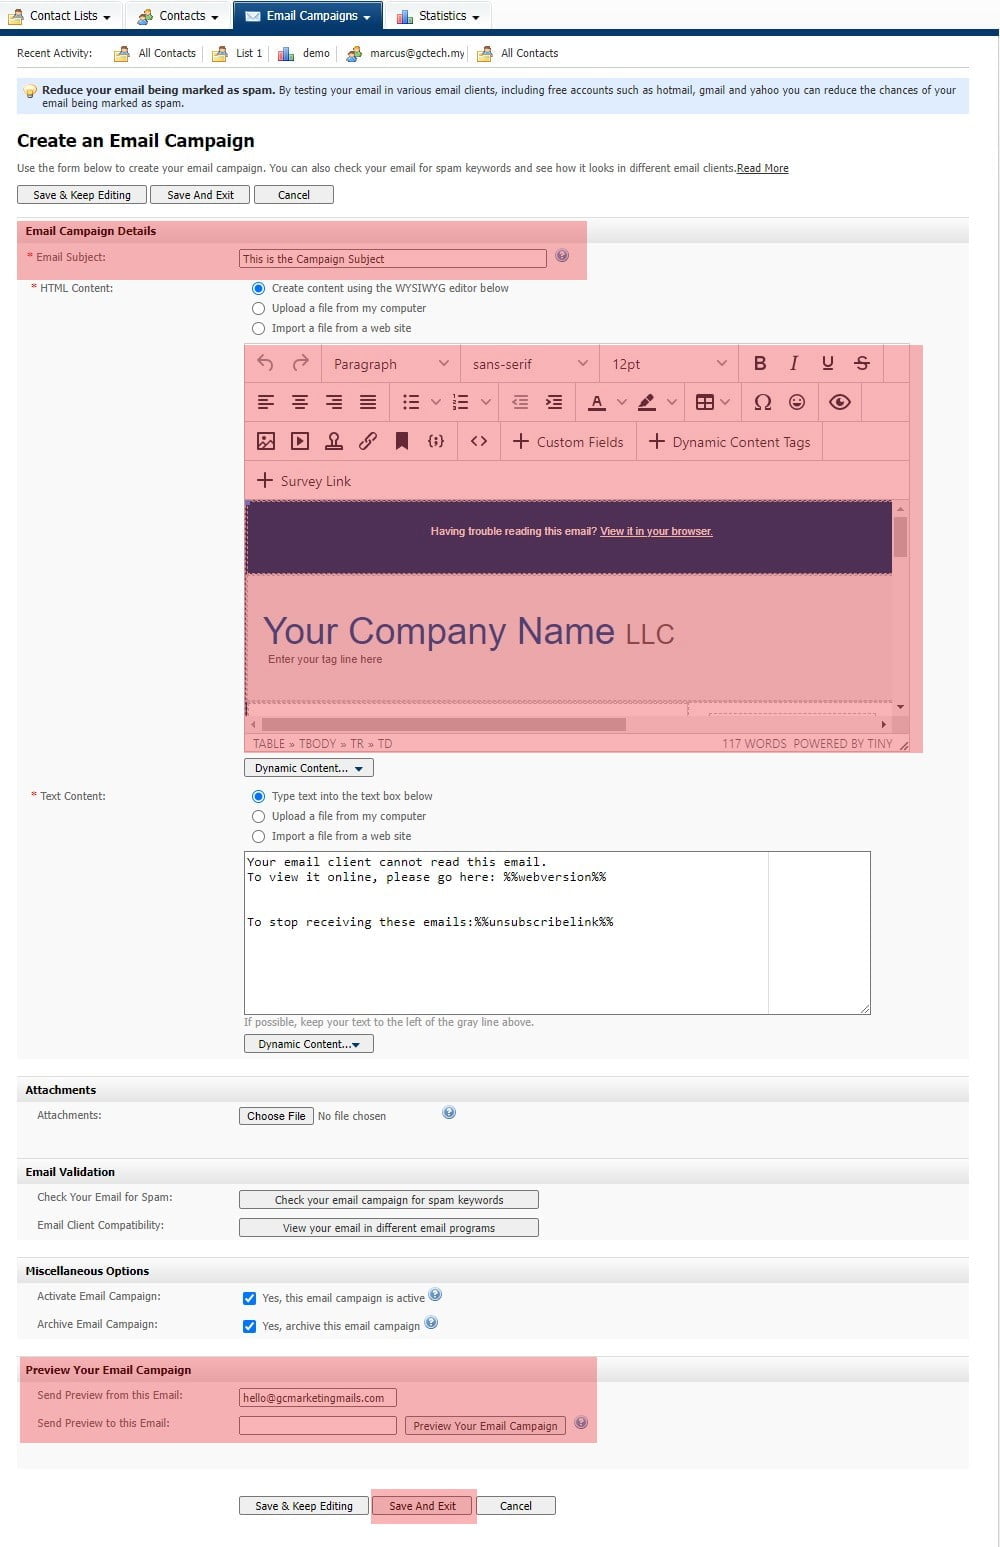
12. Key in Email Subject, Edit campaign, and you also can preview by using preview button at below. If everything is done, you may click on save and exit.
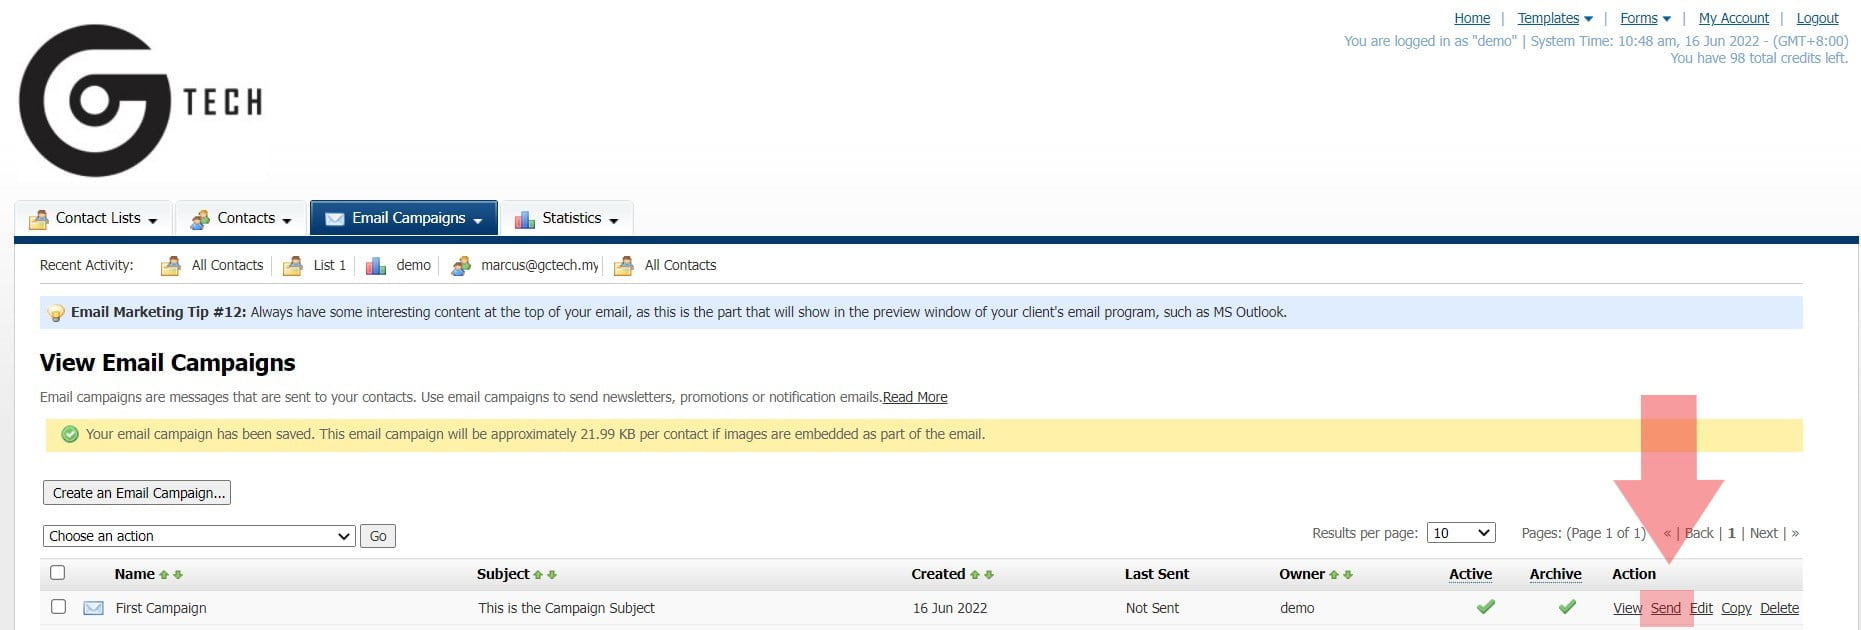
13. Click on Send now.
Note : If reply to information is different with sender information, please untick and key in.
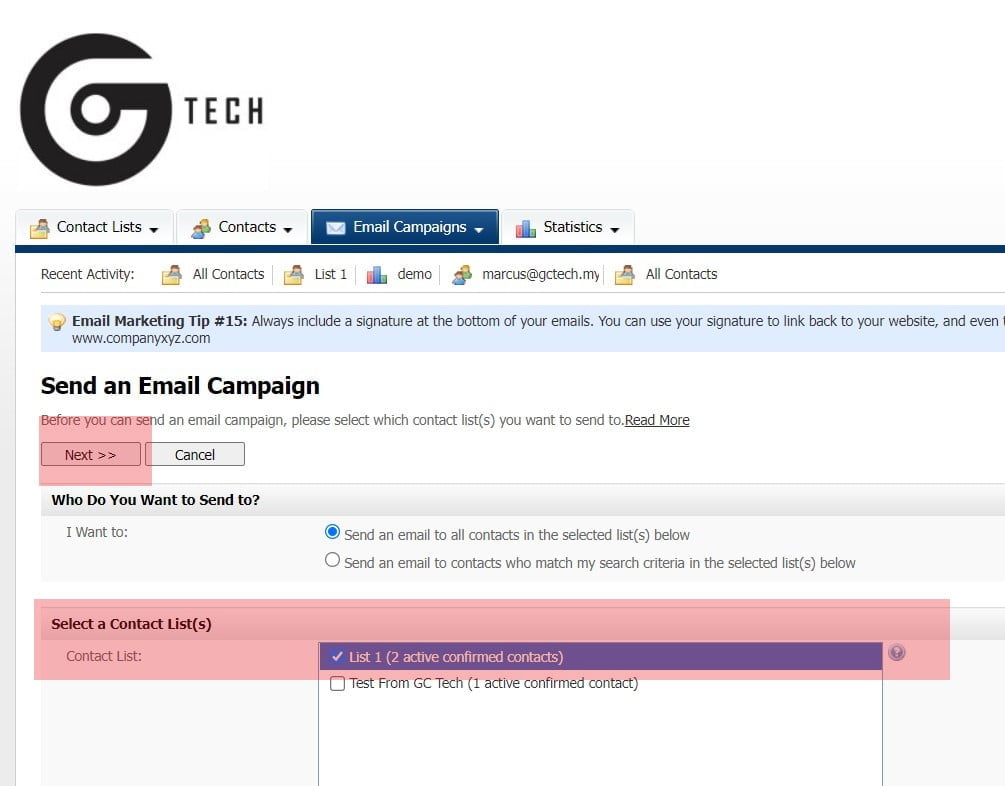
14. Select the List that you wanted to send to, and click next.
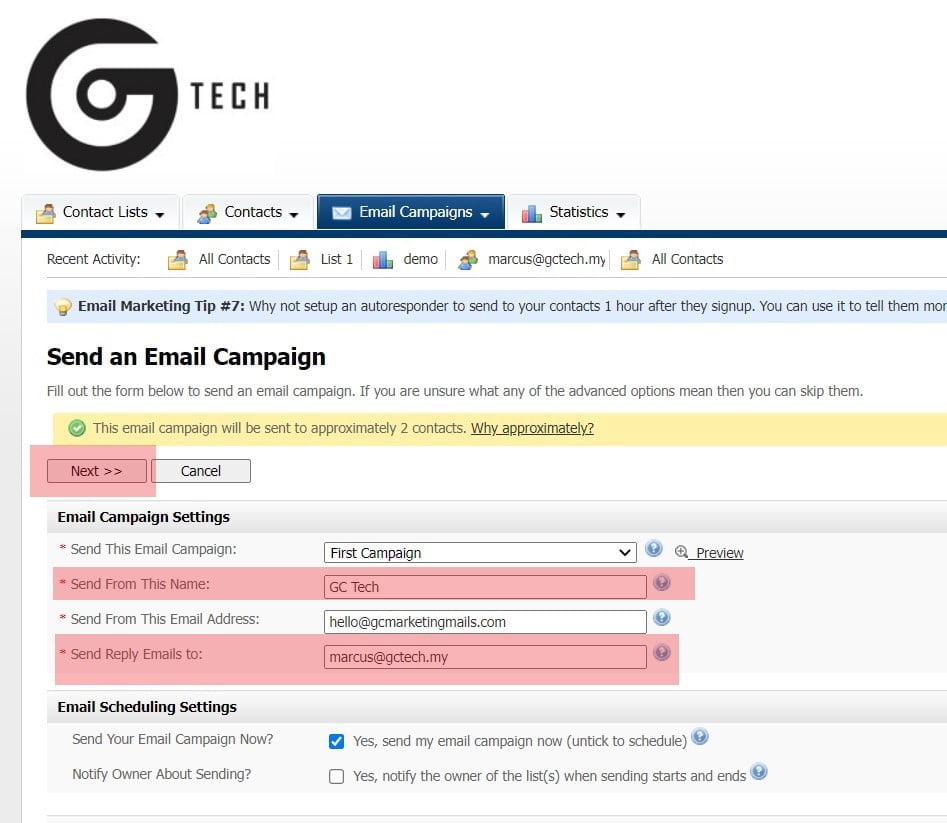
15. Before sending out the campaign, kindly change the reply email and sender name to your desirer email / name.
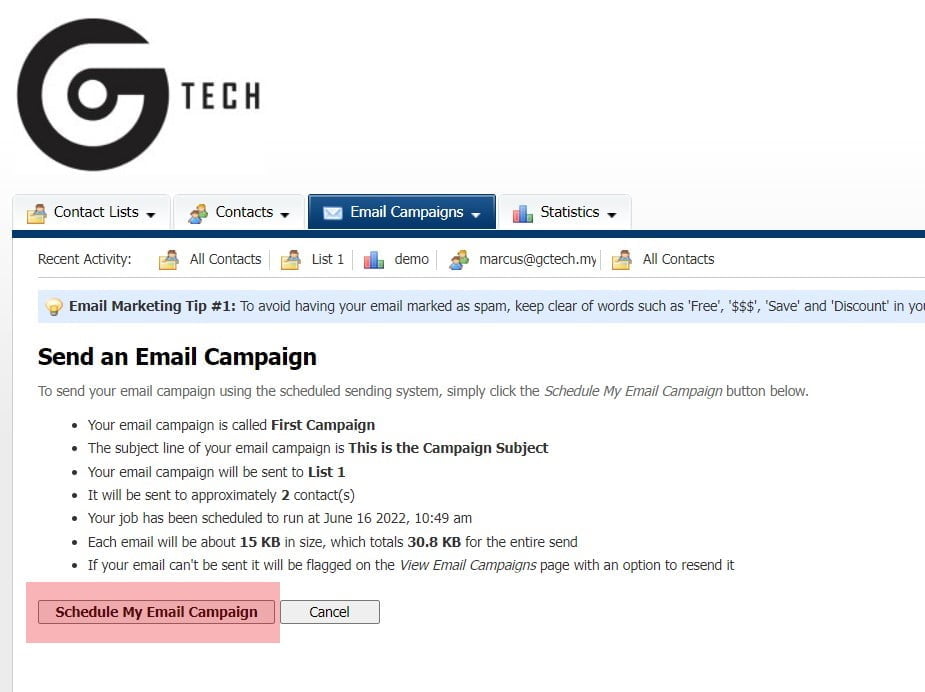
16. Click on schedule my email campaign to blast.
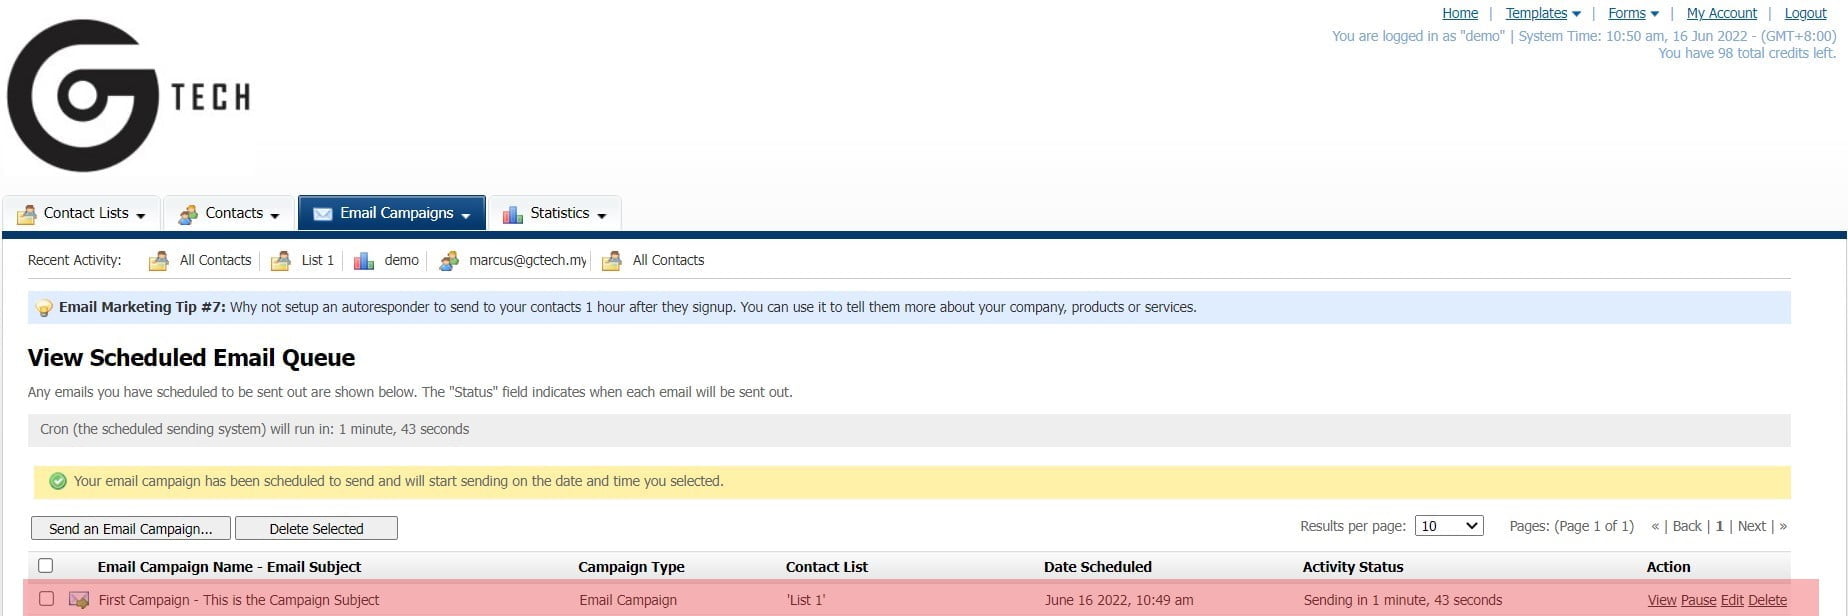
17. Queuing in the Server
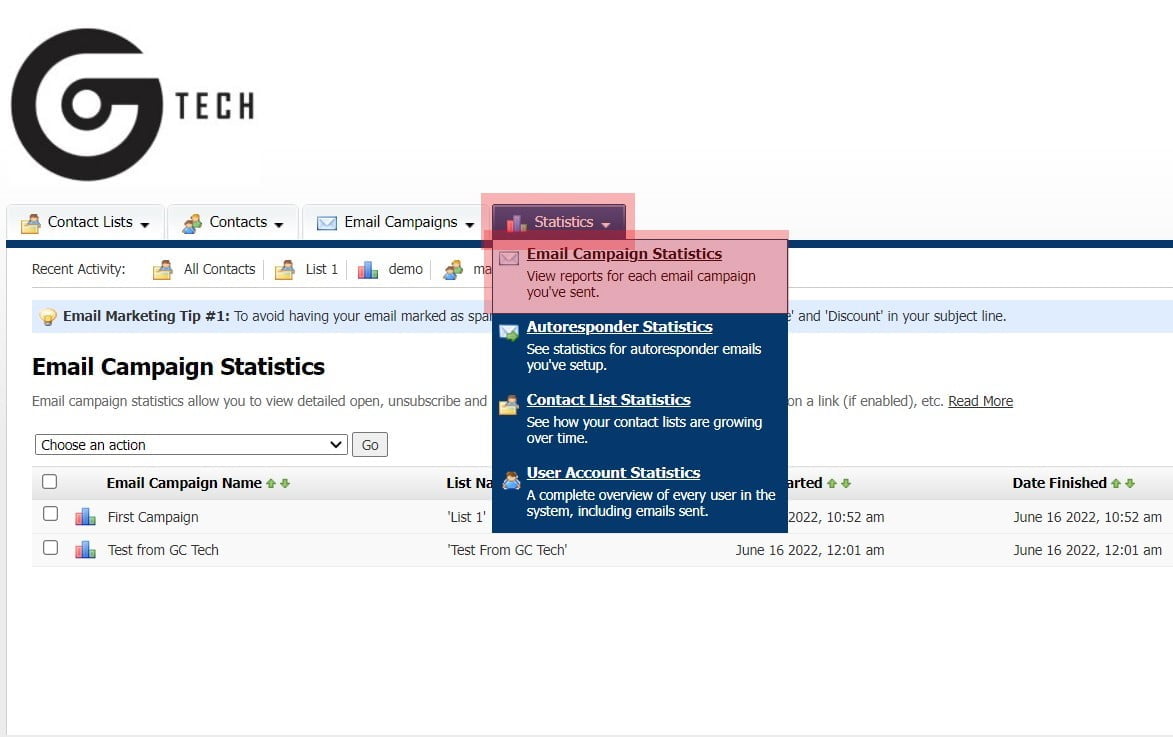
18. Click on Statistics and Email Campaign Statistics for the report.
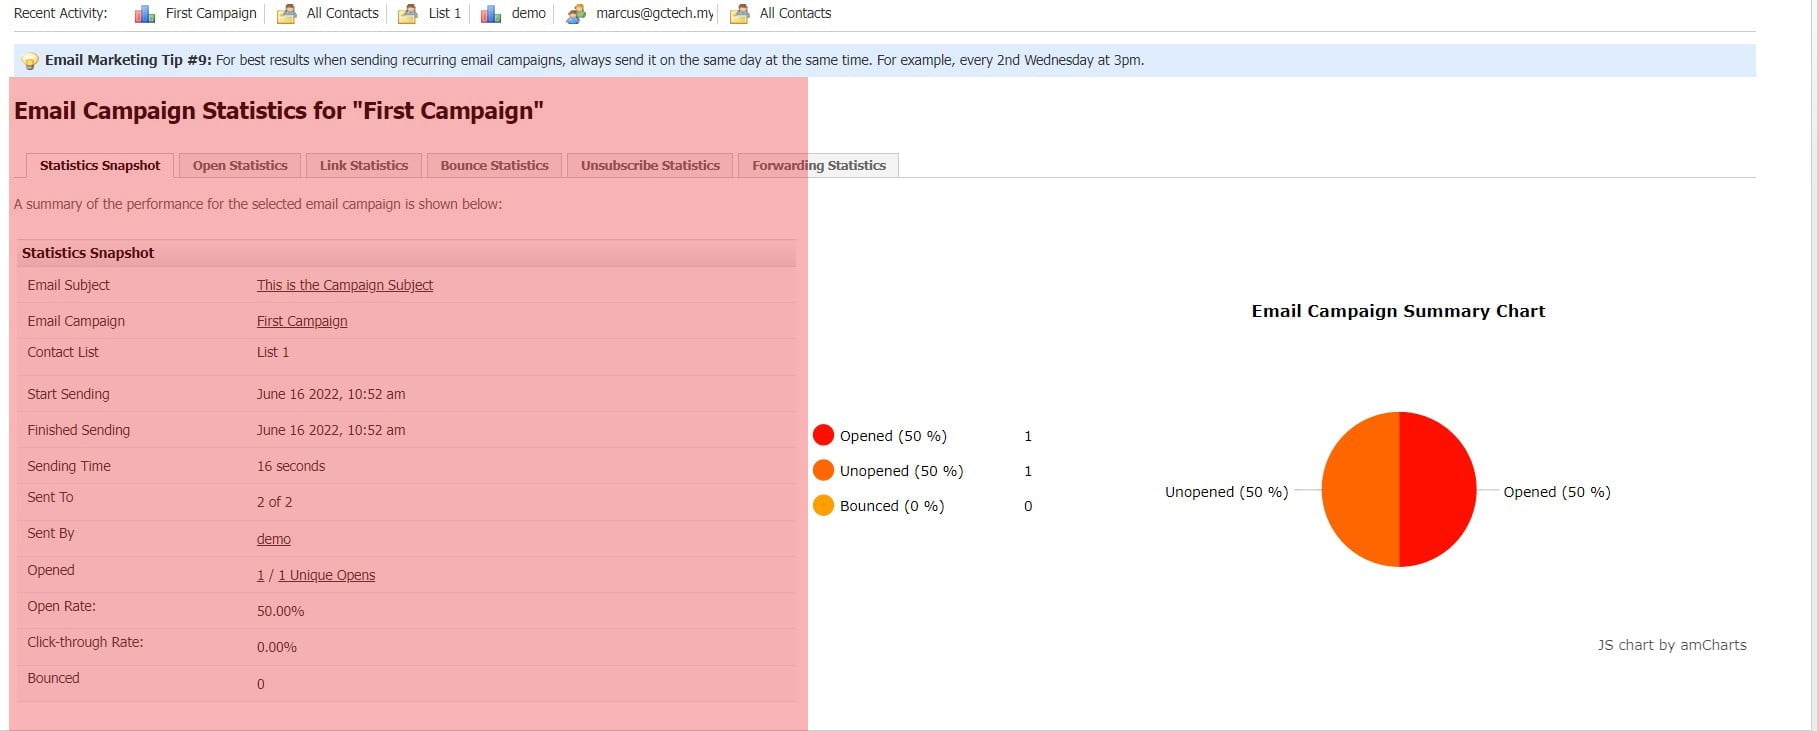
19. This is how the campaign report shows.